Your first sketch
First steps
Blockly is the graphical programming interface for the senseBox developed by the senseBox team. It's based on the Blockly Framework from Google and it's available online for free and without any software installation.
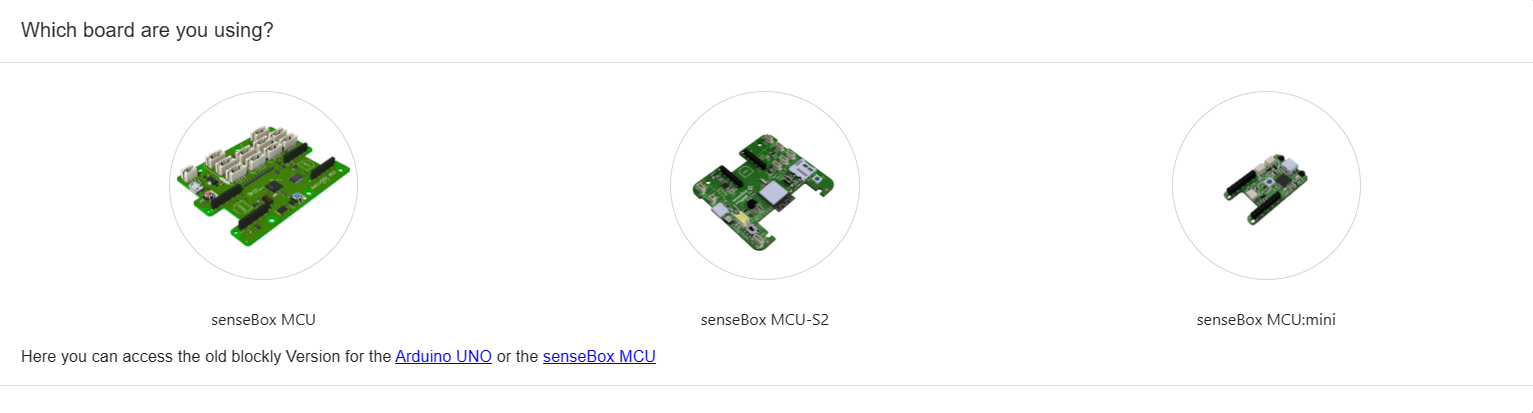
Open Blockly for senseBox in your browser by visiting https://blockly.sensebox.de. The first thing you will see is a selection of senseBox versions. Choose the version you are using.
Interface
Once you have selected your senseBox version, you will see the Blockly interface, which can be divided into six sections.
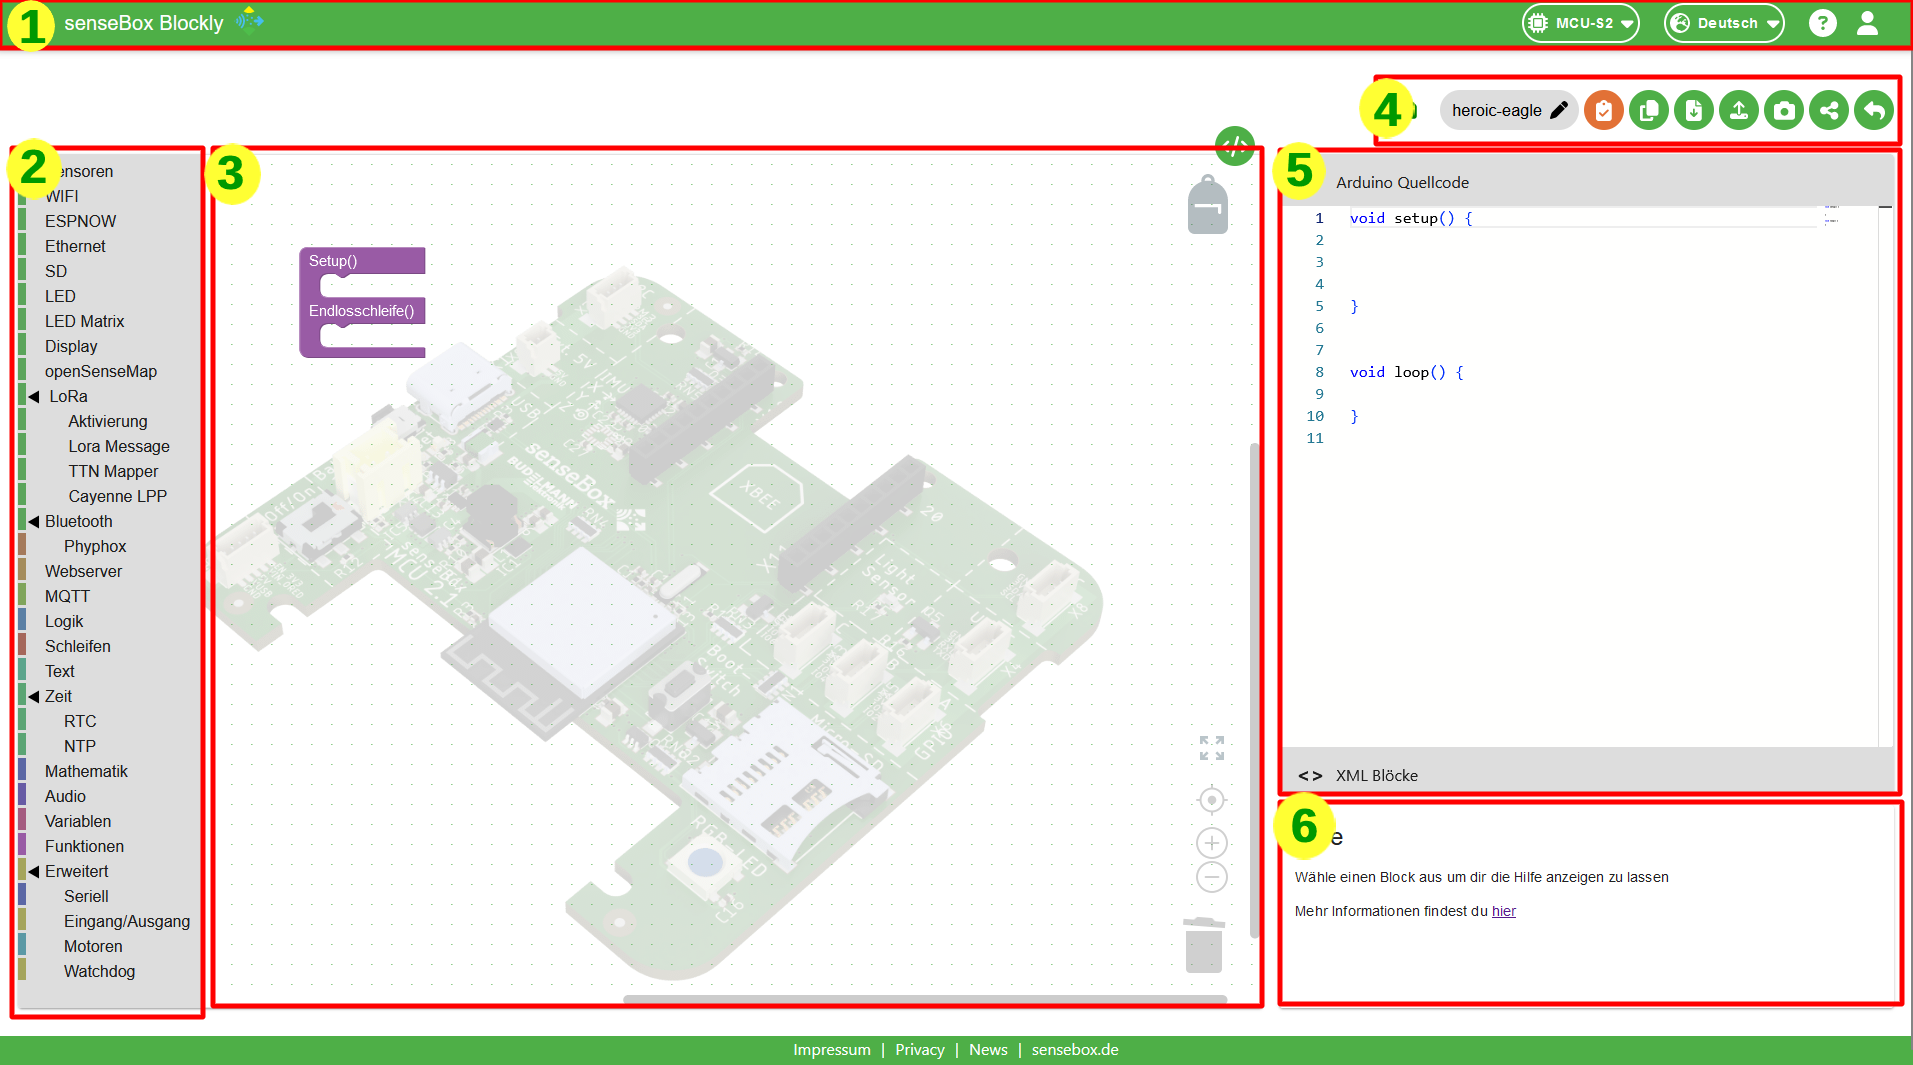
- Menu bar: From the menu bar, you can change the board you are using or the language. On the left side, you can also navigate to the tutorials and the gallery. The tutorials offer a guide for your first Blockly sketches and introduce you to the various sensors and functions of the senseBox. In the gallery you will find selected sketches from the senseBox team.
- The toolbar: Here you will find all the blocks for programming the senseBox. The color of the blocks indicates the category to which the block belongs.
- The workspace: This is where you put your programs together. At the bottom right are buttons to center, zoom in, zoom out, and delete blocks.
- Copy, compile, and other Blockly functions: Here you will find the most important button for Blockly. With the orange 'Compile' button, you can compile and download your created sketch. Additionally, you can rename, download, share, create screenshots of your sketch, or copy the Arduino source code of your sketch to the clipboard.
- Arduino source code and XML blocks: Here you can see the Arduino source code parallel to the graphical programming. By clicking on the XML blocks button, you can switch the view to the XML code.
- Help box: Here you will find a brief guide on how to use the selected block and where you can find more information.
Programming
To write your program, the blocks from the toolbar must be placed in the workspace using drag & drop.
Step 1: Run First and Loop Forever
This block is loaded directly when the interface starts and should always be used.
The two basic functions Arduino run first and Arduino loop forever are always needed to write a functional program.
Blocks that are inside the Arduino run first function are executed only once at the beginning of the program.
Here, for example, the display is initialized or the WLAN connection is established.
Blocks that are inside the Arduino loop forever function are executed continuously.
The microcontroller always executes all blocks from top to bottom.
In the Arduino loop forever function, for example, the sensors are read or the measured values are saved on an SD card or transmitted to the Internet.

Step 2: Turn on the built-in LED
To turn on the built-in LED, it must first be initialized. To do this, drag the RGB LED (WS2818) initialize block into the Arduino run first function.
The PIN is already selected as onBoard. You can leave the values for brightness and number as they are.
To turn on the built-in LED, you must drag the LED on digital block into the Arduino loop forever function.
Then select BUILTIN_1 under PIN and On under Status.

After that, you can use the Set RGB LED block in the Arduino loop forever function to make the LED light up in a color of your choice.

Step 3: Let the built-in LED blink
To make the built-in LED blink in a random color, you can use the Interval block in the Time category.
Drag this block into the Arduino loop forever and set the time to 500ms.

Compile and download
After your program is finished, click the orange "Compile" button and a .BIN file will be offered for download. Save this file at any location on your computer.