SD module
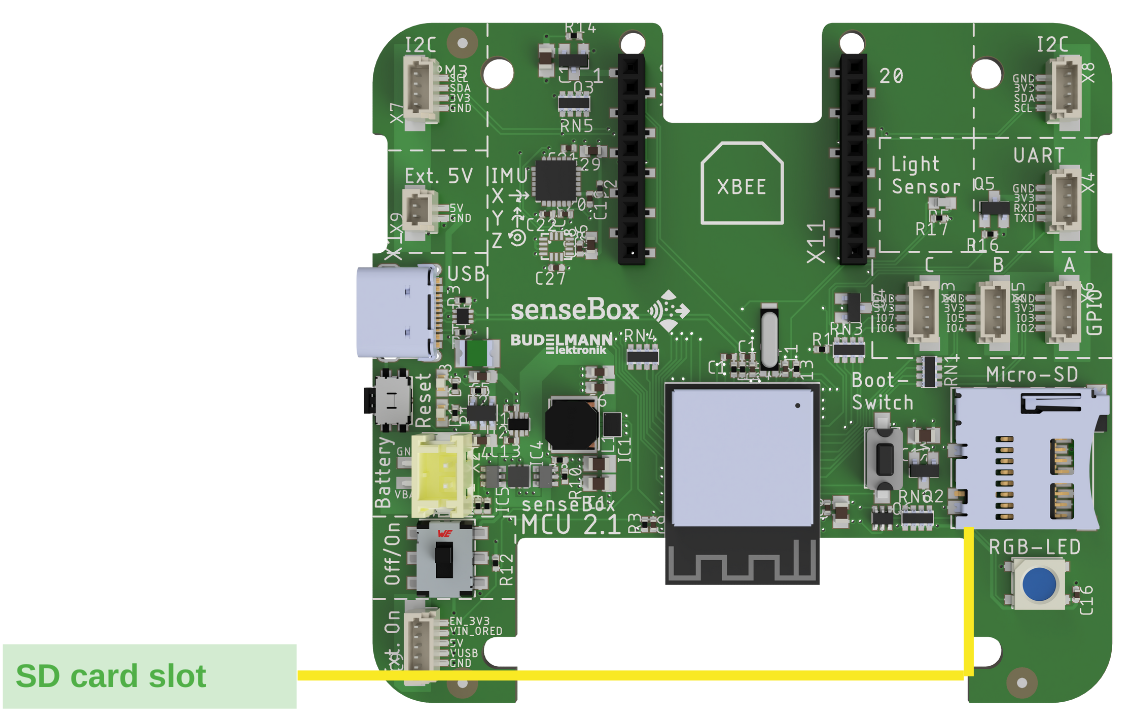
You can find the SD module here on the right side of the MCU S2
With the senseBox, you can use the SD-Bee to store data on a microSD card for later analysis on the computer.
The SD module is built into the MCU S2! So you don't need to connect anything else.
Programming (Arduino)
In this sketch, the values from a sensor (in this case, the HDC1080) are read and stored on the SD card. We use an interval that triggers every 60 seconds.
#include <SD.h>
#include <SPI.h>
#include "FS.h"
#include <Adafruit_HDC1000.h> // https://github.com/adafruit/Adafruit_HDC1000_Library

const long intervalInterval = 60000;
long time_startInterval = 0;
long time_actualInterval = 0;

File Daten;
Adafruit_HDC1000 hdc = Adafruit_HDC1000();
SPIClass sdspi = SPIClass();

void setup() {

    pinMode(SD_ENABLE,OUTPUT);
    digitalWrite(SD_ENABLE,LOW);
    sdspi.begin(VSPI_SCLK,VSPI_MISO,VSPI_MOSI,VSPI_SS);
    SD.begin(VSPI_SS,sdspi);
    Daten = SD.open("/Daten.csv", FILE_WRITE);
    Daten.close();
    hdc.begin();
}

void loop() {
    time_startInterval = millis();
    if (time_startInterval > time_actualInterval + intervalInterval)
    {
        time_actualInterval = millis();
        Daten = SD.open("/Daten.csv", FILE_WRITE);
        Daten.println(hdc.readTemperature());
        Daten.close();
    }

}
Programming (Blockly)
With the Create file on SD card block, a new file can be created on the SD card in the setup().
The name of the file can be changed in the dropdown menu of the block.
![]()
With the Open file on SD card block, the previously created file can then be opened in the loop.

In the block section of the Open file on SD card block, the Write data to SD card block can then be placed.
In this block, the text or number to be written can be placed in the free block section.
Additionally, by checking the Line break checkbox, it can be specified whether a line break should be inserted after each measurement value or not.
Additionally, we get the block for an interval from the Time category and the desired sensor from the Sensors category.
Then we put everything together and get the following sketch.
