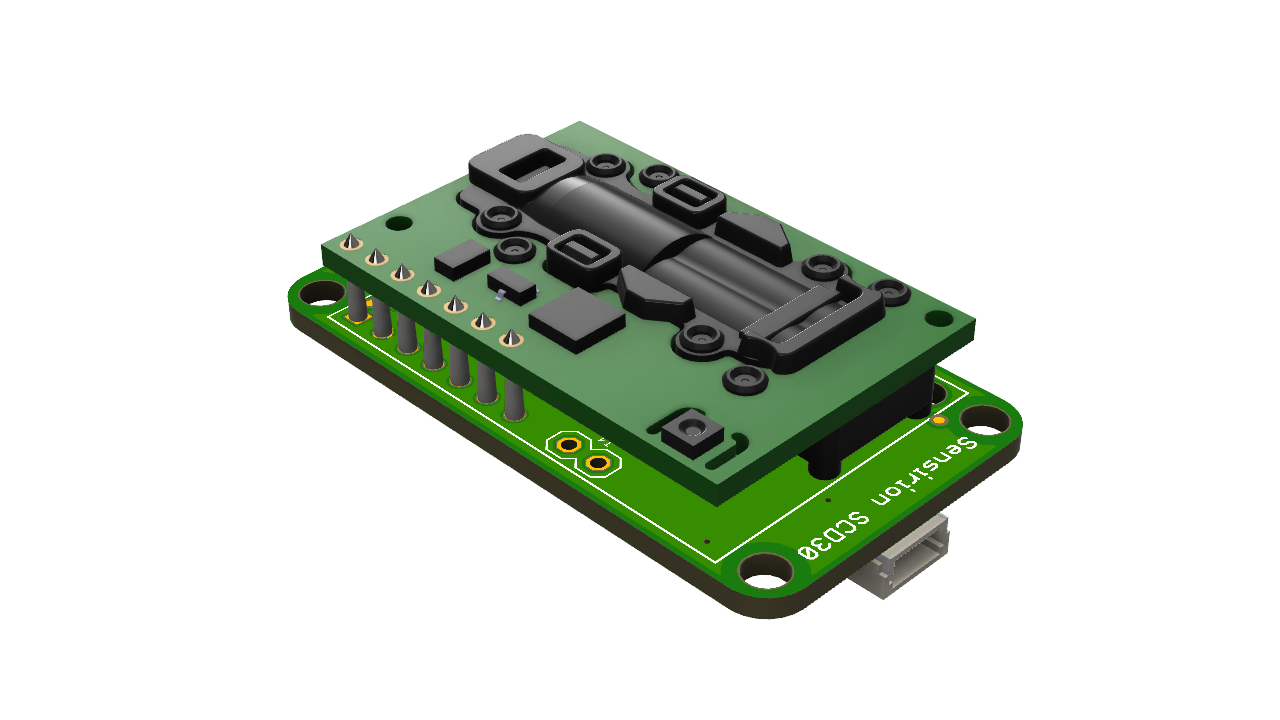
CO2 Sensor
The SCD30 is a precise CO2 sensor from the Swiss manufacturer Sensirion. The sensor board has a JST PHR4 connector, suitable for operation with the senseBox MCU. It is also equipped with the Qwiic Connect System.
In addition to CO2 detection, a high-quality Sensirion humidity and temperature sensor is used on the same sensor module. Thanks to the applied dual-channel principle for measuring carbon dioxide concentration, the sensor is designed to automatically compensate for long-term drifts.
The CO2 sensor should not be used permanently outdoors.
CO2 Sensor
Technical Information
- CO2 measurement range: 0 - 40,000 ppm
- Accuracy: ± (30 ppm + 3% MV) (25 °C, 400 - 10,000 ppm)
- Repeatability: 10 ppm
- Temperature stability: 2.5 ppm / °C (0-50 °C)
- Response time: 20s
- Humidity measurement range: 0 - 100 % RH
- Accuracy: ±3% RH (0-100% RH)
- Repeatability: 0.1% RH
- Response time: 8s
- Temperature measurement range: -40 °C - 70 °C
- Accuracy (°C): ± (0.4 °C + 0.023 x (T [°C] - 25°C))
- Repeatability (°C): 0.1 °C
- Response time: >10s
Connection
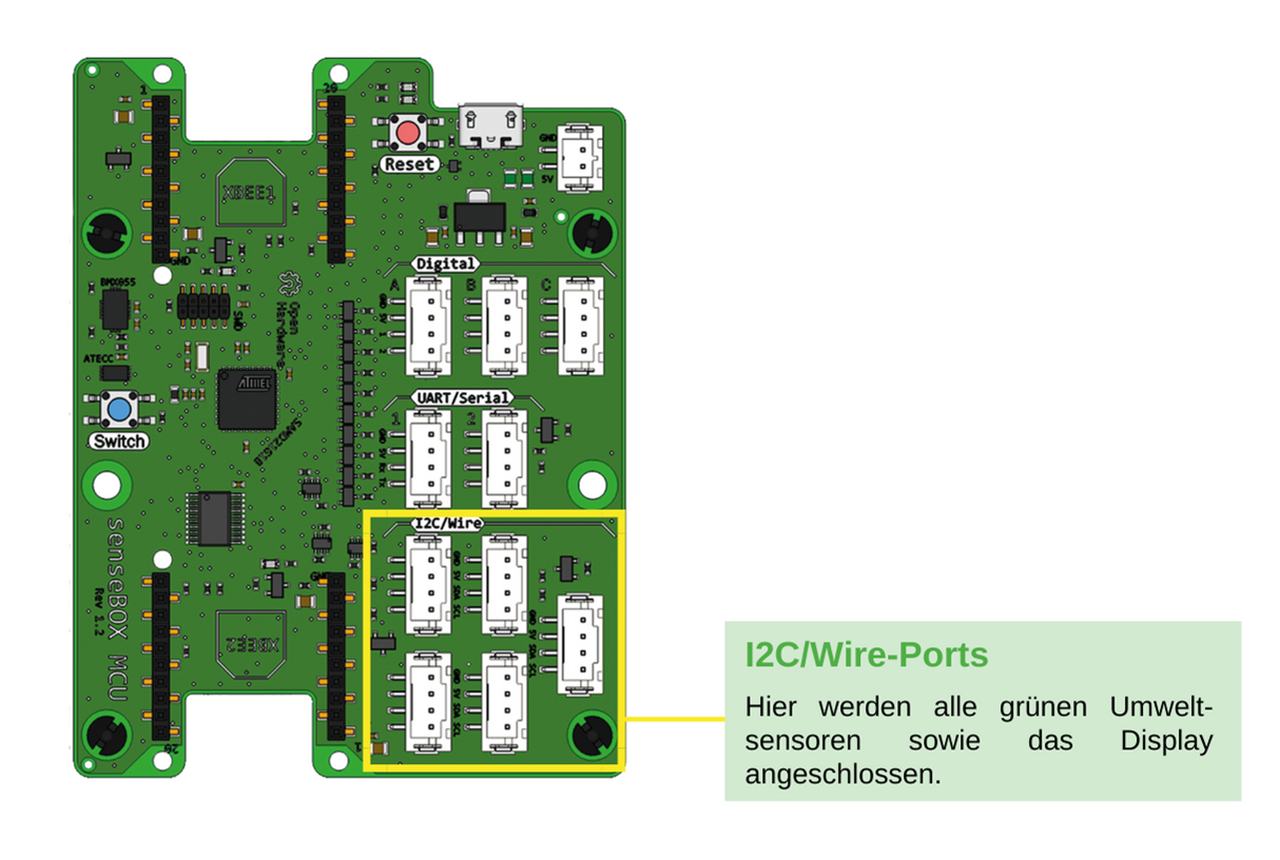
Die Komponente wird am I2C Port angeschlossen.
Programmierung (Arduino)
Dieser Sketch liest die CO2-Konzentration und gibt sie im Seriellen Monitor aus.
Software Library
To program the sensor in Arduino, you need to install the software library SparkFun SCD30 Arduino Library.
Code
#include <senseBoxIO.h>
#include <SparkFun_SCD30_Arduino_Library.h> // http://librarymanager/All#SparkFun_SCD30_Arduino_Library

SCD30 airSensor;

void setup() {
  Serial.begin(9600);
  Wire.begin();
  if (airSensor.begin() == false)
  {
    while (1)
      ;
  }
  airSensor.useStaleData(true);
}
void loop()
{
 Serial.println(airSensor.getCO2());
 delay(500);
}
Programming (Blockly)
You can read the CO2 sensor with the following block.

Calibrating the CO2 Sensor (Auto Calibration)
As a rule, the CO2 sensor comes pre-calibrated. Rough handling, shipping, or soldering can reduce the accuracy of the sensor, making calibration necessary. For this sketch, you need the display. If you don't have a display, you can delete the display-related parts, this does not affect the calibration of the sensor!
To calibrate the CO2 sensor, it must be exposed to fresh air with a CO2 concentration of 400ppm for at least 7 days, each day for at least one hour.
As long as the sensor is not set up in the immediate vicinity of a CO2 source (e.g., your own breath, combustion process, etc.), we can assume that the atmosphere has a concentration of about 400ppm tendency increasing.
Install the Board Support Package of the senseBox and additionally the SparkFun_SCD30_Arduino_Library via the library manager in the Arduino IDE.
Then you can upload the following sketch to the MCU.
Alternatively, the compiled .bin file can be downloaded here.
#include <SPI.h>
#include <Wire.h>

#include "SparkFun_SCD30_Arduino_Library.h"

// DISPLAY_PART_START
#include <Adafruit_GFX.h>
#include <Adafruit_SSD1306.h>
#define OLED_RESET 4
Adafruit_SSD1306 display(OLED_RESET);
// DISPLAY_PART_ENDE
SCD30 airSensor;


void setup() {
  // DISPLAY_PART_START
  senseBoxIO.powerI2C(true);
  delay(2000);
  display.begin(SSD1306_SWITCHCAPVCC, 0x3D);
  display.display();
  delay(100);
  display.clearDisplay();
  // DISPLAY_PART_ENDE
  if (airSensor.begin(Wire, true) == false)
  {
    while (1)
      ;
  }
  airSensor.getAutoSelfCalibration();
}


void loop() {

  // DISPLAY_PART_START
  long time_elapsed = millis();
  time_elapsed = time_elapsed / 1000;
  time_elapsed = time_elapsed / 60;

  display.clearDisplay();
  display.setCursor(0, 0);
  display.setTextColor(WHITE, BLACK);
  display.setTextSize(1);
  display.println("Sensor eine Stunde an der frischen Luft lassen!");
  display.println();
  display.println();
  display.println();
  display.print("Zeit vergangen: ");
  display.print(time_elapsed);
  display.println(" min");
  display.display();
  // DISPLAY_PART_ENDE

  if (airSensor.dataAvailable())
  {
    airSensor.getCO2();
    airSensor.getTemperature();
    airSensor.getHumidity();
  }
   delay(500);
}
After uploading the sketch, take the CO2 sensor outside to fresh air for at least 1 hour daily over a period of 7 days. The display will show you how much time has passed since the upload. For optimal calibration of the sensor, repeat this process for 7 days. Please note that the senseBox must not be turned off during this period, otherwise the calibration must be restarted!
Calibrating the CO2 Sensor (Manual Calibration)
In contrast to the automatic calibration of the CO2 sensor, which takes at least 7 days, you can alternatively perform manual calibration. An excellent guide has been written in the senseBox forum.
The compiled .bin file can be downloaded here.